Automotive oddity website,
Benrus steering wheel clock mounts page 1st generation
If you came to this page directly from a search engine you missed most of the story
Click on this link to go to the clocks main page
click on any picture to enlarge it
1953-56 Benrus steering wheel clock mounting images and description
On this page I am going to try and explain what mounting brackets were use for what applications for the first series Benrus steering wheel clocks/watches. No matter what series clock MoParmatic, Chryslermatic, Desotomatic, Plymouthmatic or even the plain berus with no series name, all of the DK14 movements had the same mounting pattern. There were different mounting brackets used to install the clocks in different applications. The 1954 MoPar Merchandiser bulletin states that 2 3/4" was the standard size and the 3" holes required retainer #1546-864. This information of course would apply to the 1953-54 applications and may not apply to 1955-56 applications? By looking at mounts that were on original clocks we should be able to determine what is needed, what is part of a standard horn ring center and what might be used to make mounts?Mount for 2 3/4" horn ring center
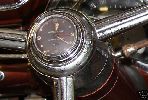
Here is a 2 3/4" mount in use

You can see here that the clock is just barely smaller than the retainer
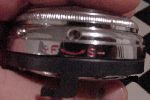
Looks like most horn button ornament holders from this angle but this one is black
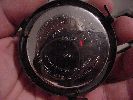
Looks pretty basic from this angle also, I wonder if a standard medallion retainer can be used with holes drilled for the screws?
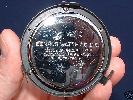
another shot of a different clock with the 2 3/4" retainer
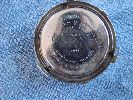
Another clock same shot
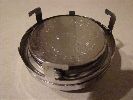
This one is on a Plymouthmatic notice it is chrome or stainless.
Mount for 3" horn ring center
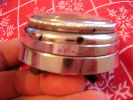
Side shot of the 3" retainer
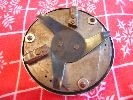
Back shot of the 3" retainer, Look at the next comparison shot

Here is a comparison shot of mounts. On the left is the Chryslermatic 3" mount, Center is a 1955-56 Desoto horn center that is the same with our without the clock. and on the right is a 1955-56 Chrysler standard horn button without clock. I believe the triangular shaped back plate with the three point spring clip is the same on all three? The large metal blocks pinned to the back of the chryslermatic mount are to keep the clock from spinning past a stop. On the other two horn centers there are stops cast into the chrome housing that are not on the clock skirt of the 3" retainer
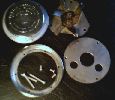
3" retainer and clock exploded view. Upper left clock, upper right spring clip retainer with added blocks, lower right reinforcemnt plate with three small holes for mount screws and two larger holes to clear the pins for the stop blocks and one large hole to clear the pins for the spring clip, lower left clock skirt and screws. Three short screws to mount the skirt and three longer screws to mount the back plate and reinforcement plate.
Good news for people that need clock mounts
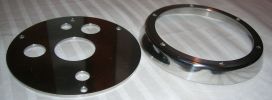
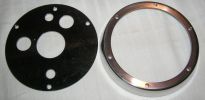
1955-56 Desoto mount

Desotomatic installed
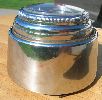
Everything from the gold ring behind the clock down is standard equipment on all 55-56 Desotos.
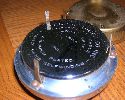
The three little brass fingers are all that needs to be made to mount a steering wheel clock in a 55-56 De soto
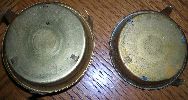
On the left is a Desotomatic clock mounted in a horn center medallion retainer. The three hook legged brass piece is standard on all 55-56 Desotos. On the right is a standard horn ring center medallion with the legs broke off. Simply bend the three little tabs that hold the standard center medallion in place and insert the three brass legs from the clock through the same holes and bend them over. reinsert the center section with clock in the chrome bezel and reinstall on the steering wheel
If anyone has more information and or images of original mounts please send them to me and I will share the information with the world.
Go to the steering wheel clocks home page
If you have additional information, images or literature you would like to share I will add it to the webpage during a future update. Also if you have any of these clocks for sale I am a buyer or may be able to help you find a buyer
| Home page | Main clocks page | Links |
|
Site Built: 08/22/10
Last Update: 10/20/11 |
Welcome to my mis-spelled word file!